Last week started with some kind of epiphany: I've kinda forgotten the idea of the iterative top-down development of Agile development, which is sad.
So after a bit of reflexion, I've decided that it was time to start building stuff like menus, save files and playable characters.
This way I could ship a playable alpha quicker, meaning that I could start getting monetary funds sooner.
But anyway, let's get right to it!
New Shader
Beforehand, let me show you my newest shader.
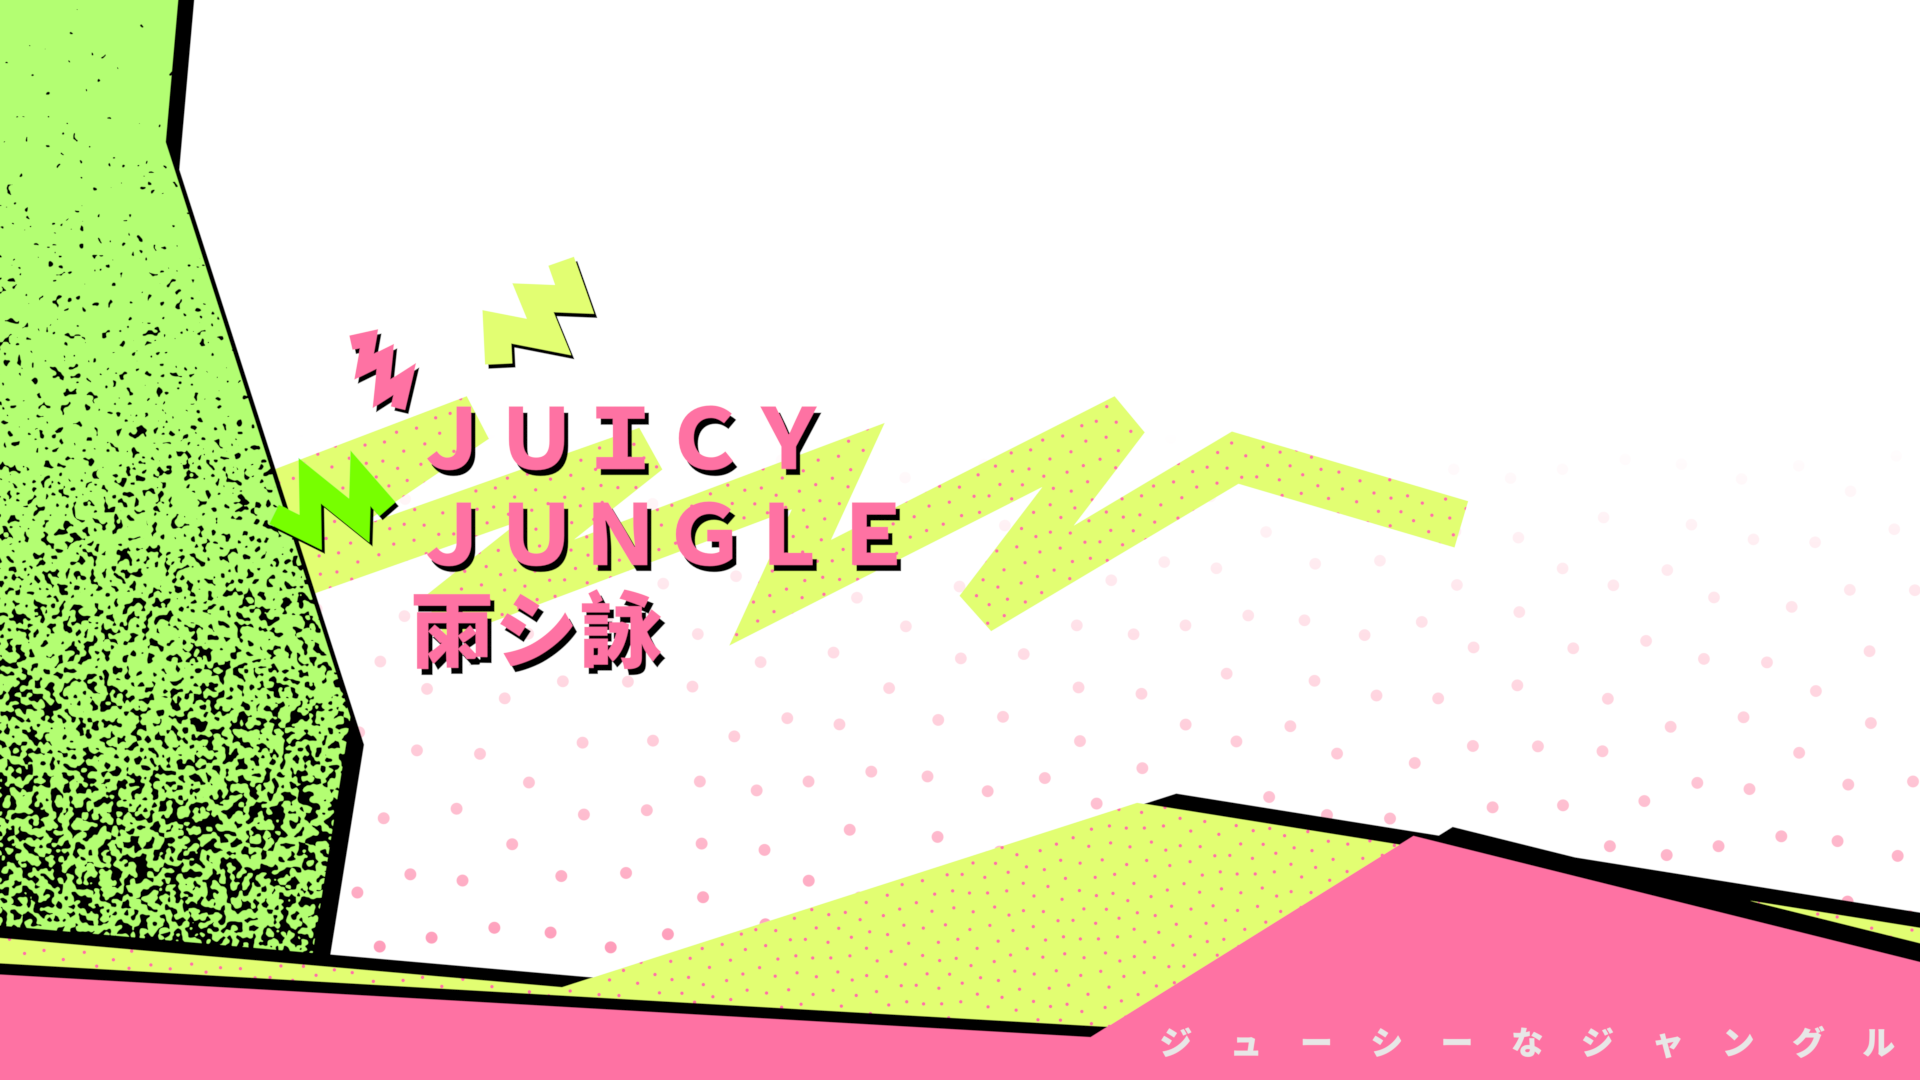
This one is supposed to mimic Memphis-like designs. The name "Memphis" comes from the "Memphis Group", an Italian designer group that tried to design THE design of the decade (which coincidently was the 80's). This design was mainly expressed through furniture, although it was still used in many other media.
Here are some examples:


(Fun fact: most furniture made by the group was actually bought by David Bowe for some reason. By far he had the most exhaustive collection.)
But anyway, here's the shader:
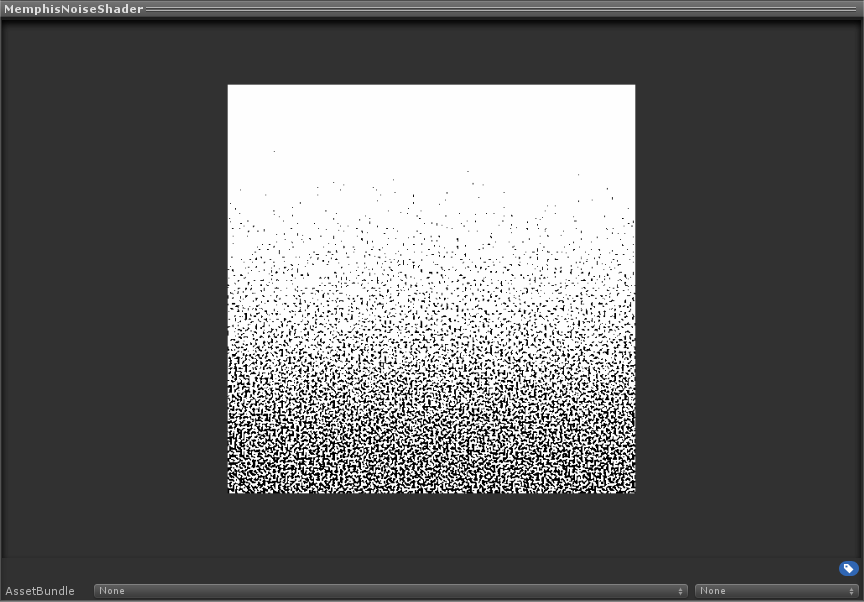
The shader is supposed to represent a rough texture typically found in many Memphis designs like so:

As for the actual shader, I've first experimented with that kind of noise while making splash screens mockups in Blender.
Here's the original mockup:
(Notice the green bar on the left)
This was achieved by using the Musgrave cycles node. The main gist is to use a Perlin noise to which we apply different types of filter to change their appearance to match the desired texture.
So I've figured that if I wanted to translate this shader in Unity I needed to take a look at blender's source code, which is coincidently open.
Here's the final shader code:
float4 mod(float4 x, float4 y)
{
  return x - y * floor(x / y);
}

float4 mod289(float4 x)
{
  return x - floor(x / 289.0) * 289.0;
}

float4 permute(float4 x)
{
  return mod289(((x*34.0)+1.0)*x);
}

float2 fade(float2 t)
{
  return t*t*t*(t*(t*6.0-15.0)+10.0);
}

float4 taylorInvSqrt(float4 r)
{
  return (float4)1.79284291400159 - r * 0.85373472095314;
}

// Classic Perlin noise
float cnoise(float2 P)
{
  float4 Pi = floor(P.xyxy) + float4(0.0, 0.0, 1.0, 1.0);
  float4 Pf = frac (P.xyxy) - float4(0.0, 0.0, 1.0, 1.0);
  Pi = mod289(Pi); // To avoid truncation effects in permutation
  float4 ix = Pi.xzxz;
  float4 iy = Pi.yyww;
  float4 fx = Pf.xzxz;
  float4 fy = Pf.yyww;

  float4 i = permute(permute(ix) + iy);

  float4 gx = frac(i / 41.0) * 2.0 - 1.0 ;
  float4 gy = abs(gx) - 0.5 ;
  float4 tx = floor(gx + 0.5);
  gx = gx - tx;

  float2 g00 = float2(gx.x,gy.x);
  float2 g10 = float2(gx.y,gy.y);
  float2 g01 = float2(gx.z,gy.z);
  float2 g11 = float2(gx.w,gy.w);

  float4 norm = taylorInvSqrt(float4(dot(g00, g00), dot(g01, g01), dot(g10, g10), dot(g11, g11)));
  g00 *= norm.x;
  g01 *= norm.y;
  g10 *= norm.z;
  g11 *= norm.w;

  float n00 = dot(g00, float2(fx.x, fy.x));
  float n10 = dot(g10, float2(fx.y, fy.y));
  float n01 = dot(g01, float2(fx.z, fy.z));
  float n11 = dot(g11, float2(fx.w, fy.w));

  float2 fade_xy = fade(Pf.xy);
  float2 n_x = lerp(float2(n00, n01), float2(n10, n11), fade_xy.x);
  float n_xy = lerp(n_x.x, n_x.y, fade_xy.y);
  return 2.3 * n_xy;
}


/* Noise Bases */

float safeNoise(fixed4 p)
{
  return cnoise(p);
}

float noiseMusgraveHeteroTerrain(fixed4 p, float H, float lacunarity, float octaves, float offset)
{
  float value, increment, rmd;
  float pwHL = pow(lacunarity, -H);
  float pwr = pwHL;
  int i;

  /* first unscaled octave of function; later octaves are scaled */
  value = safeNoise(p) - offset;
  p *= lacunarity;

  for (i = 1; i < (int)octaves; ++i)
  {
    increment = (safeNoise(p) + offset) * pwr * value;
    value += increment;
    pwr *= pwHL;
    p *= lacunarity;
  }

  rmd = octaves - floor(octaves);

  if (rmd != 0.0)
  {
    increment = (safeNoise(p) + offset) * pwr * value;
    value += rmd * increment;
  }

  return value;
}
fixed4 frag(v2f IN, UNITY_VPOS_TYPE screenPos : VPOS) : SV_Target
{

  half4 color = (tex2D(_MainTex, IN.texcoord) + _TextureSampleAdd) * IN.color;
  fixed2 g_Resolution = _ScreenParams.xy;
  float factor =  -IN.texcoord.y + 1;

  float dimension = max(_NoiseDimensions, 1e-5);
  float octaves = clamp(_NoiseDetails, 0.0, 16.0);
  float lacunarity = max(_NoiseLacunarty, 1e-5);

  fixed4 p = screenPos;
  p = p / _NoiseScale;

  float intensity = 1.0;
  float offset = smoothstep(1, 0,factor);

  color.rgb = lerp(color.rgb, _NoiseColor.rgb,  saturate(intensity * noiseMusgraveHeteroTerrain(p,  dimension, lacunarity, octaves, offset)));

  return color;
}
The Menus
Then the next big thing was to create different menus in the game.
In order to achieve a somewhat proper menu navigation, I've first created a simple navigation flow chart that tells what is the flow between two screens. For example, the player firstly goes through the Title screen, then goes to the main menu and so on.
As for the actual implementation, I've decided to use the State design pattern. This way I can easily create simple flows between two screen.
First, I've got an AbstractMenuState class:
using System.Collections;
using System.Collections.Generic;
using UnityEngine;
using UnityEngine.EventSystems;
using UnityEngine.UI;

public abstract class AbstractMenuState : MonoBehaviour
{
  public AbstractMenuState m_nextMenu;
  public AbstractMenuState m_previousMenu;
  public Animator m_menuAnimator;

  protected GameObject m_menu;

  public GameObject menu
  {
    get
    {
      if (!m_menu)
      {
        m_menu = transform.GetChild(0).gameObject;
        if (!m_menuAnimator)
        {
          m_menu.GetComponent<Animator>();
        }
      }
      return m_menu;
    }
  }

  // Show the menu
  public virtual bool ShowMenu()
  {
    menu.gameObject.SetActive(true);
    m_menuAnimator.SetBool(MenuState.instance.openParameterId, true);
    selected = firstSelectable;
    return true;
  }

  // Hide the menu
  public virtual bool HideMenu()
  {
    m_menuAnimator.SetBool(MenuState.instance.openParameterId, false);
    StartCoroutine("DisableMenuDelayed");
    return true;
  }

  // Things to do when we procede to the next menu
  public virtual void OnNext() { }

  // Things to do when we return to the previous menu
  public virtual void OnPrevious() { }

  IEnumerator DisableMenuDelayed()
  {
    bool closedStateReached = false;
    bool wantToClose = true;
    MenuState instance = MenuState.instance;

    // We're disableing the menu once its animation transition is done
    while (!closedStateReached && wantToClose)
    {
      if (!m_menuAnimator.IsInTransition(0))
      {
        closedStateReached = m_menuAnimator.GetCurrentAnimatorStateInfo(0).IsName(instance.closedStateName);
      }
      wantToClose = !m_menuAnimator.GetBool(instance.openParameterId);
      yield return new WaitForEndOfFrame();
    }

    if (wantToClose)
    {
      m_menu.gameObject.SetActive(false);
    }
  }

  public GameObject firstSelectable
  {
    get
    {
      // We search for the first selectable child
      Selectable[] selectables = m_menu.gameObject.GetComponentsInChildren<Selectable>(true);
      for (int i = 0, length = selectables.Length; i < length; ++i)
      {
        Selectable selectable = selectables[i];
        if (selectable.IsActive() && selectable.IsInteractable())
        {
          return selectable.gameObject;
        }
      }
      return null;
    }
  }

  public GameObject selected
  {
    set
    {
      //Select the GameObject.
      EventSystem.current.SetSelectedGameObject(value);

      //If we are using the keyboard right now, that's all we need to do.
      var standaloneInputModule = EventSystem.current.currentInputModule as StandaloneInputModule;

      if (standaloneInputModule == null)
      {
        //Since we are using a pointer device, we don't want anything selected.
        //But if the user switches to the keyboard, we want to start the navigation from the provided game object.
        //So here we set the current Selected to null, so the provided gameObject becomes the Last Selected in the EventSystem.
        EventSystem.current.SetSelectedGameObject(null);
      }
    }
  }
}
Then I've also got a MenuState MonoBehavoir that is composed of an AbstractMenuState instance:
using System;
using System.Collections;
using System.Collections.Generic;
using UnityEngine;

// This is a Singleton
public class MenuState : MonoBehaviour
{
  public static MenuState instance;
  private bool isReady = false;
  public AbstractMenuState m_currentMenu;

  /// <summary>
  /// Awake is called when the script instance is being loaded.
  /// </summary>
  void Awake()
  {
    // Setup singletion
    if (instance == null)
    {
      instance = this;
    }
    else if (instance != this)
    {
      Destroy(gameObject);
    }

    DontDestroyOnLoad(gameObject);
    isReady = true;
  }

  const string OPEN_TRANSITION_NAME = "Open";
  const string CLOSED_STATE_NAME = "Closed";

  private int m_openParameterId;

  public int openParameterId
  {
    get
    {
    	return m_openParameterId;
  	}
  }

  public string closedStateName
  {
    get
    {
    	return CLOSED_STATE_NAME;
  	}
  }

  /// <summary>
  /// This function is called when the object becomes enabled and active.
  /// </summary>
  void OnEnable()
  {
    //We cache the Hash to the "Open" Parameter, so we can feed to Animator.SetBool.
    m_openParameterId = Animator.StringToHash(OPEN_TRANSITION_NAME);

    //If set, open the initial Screen now.

    if(m_currentMenu)
    {
      m_currentMenu.ShowMenu();
    }
  }

  // Proceding to the next menu
  public void NextMenu()
  {
    AbstractMenuStrategy next = m_currentMenu.m_nextMenu;

    if (next != null)
    {
      m_currentMenu.OnNext();
      m_currentMenu.HideMenu();
      next.ShowMenu();
      m_currentMenu = next;
    }
  }

  // Returning to the previous menu
  public void PreviousMenu()
  {
    AbstractMenuStrategy previous = m_currentMenu.m_previousMenu;

    if (previous != null)
    {
      m_currentMenu.OnPrevious();
      m_currentMenu.HideMenu();
      previous.ShowMenu();
      m_currentMenu = previous;
    }
  }
}
When the player clicks an OK button (for example), then the NextMenu() function of the MenuState is called. This internally calls the Show/Hide function of the needed AbstractMenuState and so on.
The same thing is true for any "Cancel" type of button, but using the PreviousMenu() function instead of the NextMenu() ones.
Because I'm using Unity, I can then just drag and drop each AbstractMenuState instance the m_previousMenu and m_nextMenu fields to recreate my flowchart. I can even technically set these dynamically based on which button was pressed (like in the main menu screen for example)
So let's get right into each menu then!
Title Screen

This is the title screen. The player just presses any keys to pass right through it and go straight to the main menu.
Main Menu
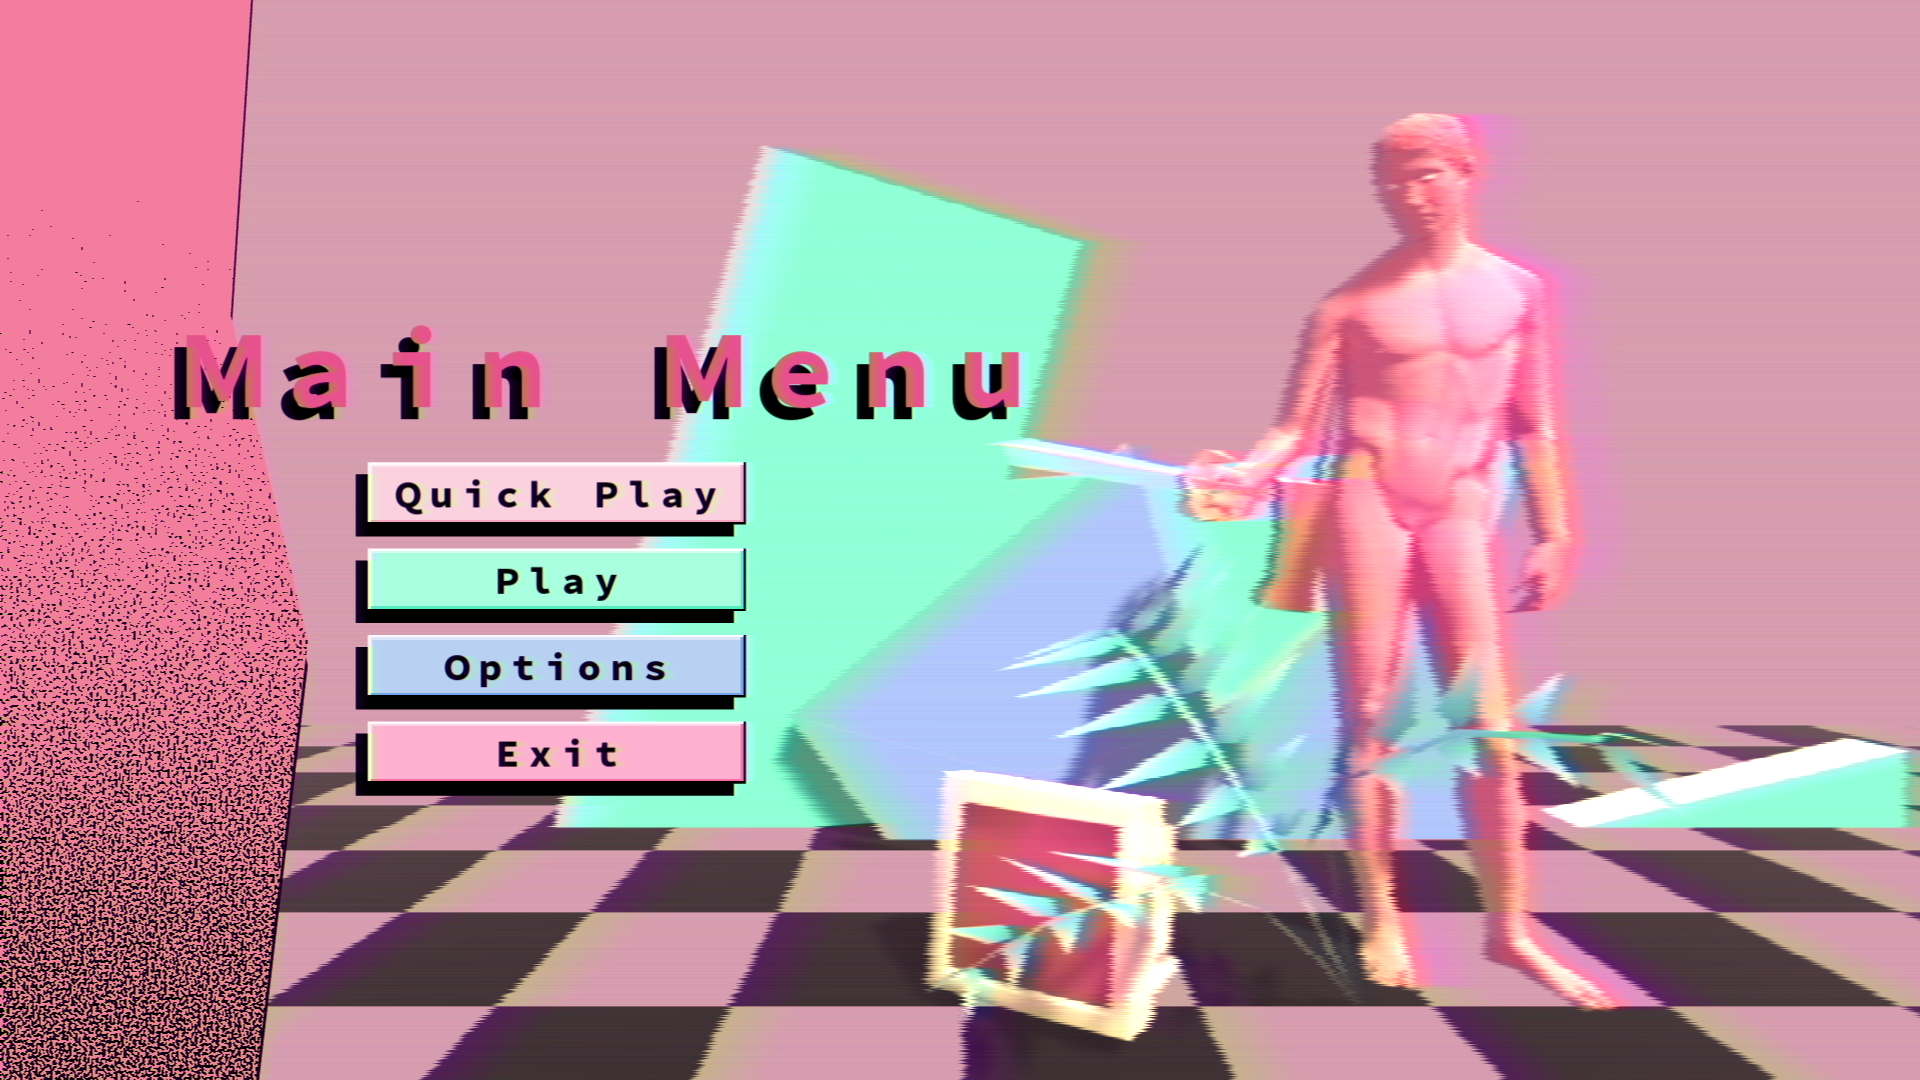
This is the main menu. The player can navigate to different screens by pressing one of the menu's buttons.
Let's see what each button do.
Quick Play

This button is quite simple; it quickly prepares a game by reusing previously used parameters.
This way the player can quickly get in the game with just one click. This automatically picks the last used savefile and character and puts the player directly at the confirm screen.
If it's the first time the game is launched, then the first savefile and the default character are used.
This is kinda useful. You only need two clicks and you're ready to go!
Play

This one is the long version of the Quick Play button.
The player then needs to pick a save file from 4 different saves. Right after that, the player chooses a playable character and is then put right at the confirm screen.
Options

This is self-descriptive. It puts the player at the options screen.
Exit

This button spawns a quitting prompt.
If the player chooses "Yes", then the game quits. Otherwise the prompt closes.
Savefile Screen

This screen is where the player can choose which save files to use.
A savefile holds many different types of pertinent statistics and information (Things like unlocks, run statistics and game completion). It also holds things like the last used character and so on.
At this screen, the player will be able to do many different types of savefile manipulation like copy and erase. As of now, these operations aren't implemented, so only the OK button works.
Before any operation buttons are enabled, the player must select a save file by clicking (or selecting if you use a controller) a specific save file.
A selected savefile will have a green checkmark on its upper-right corner.
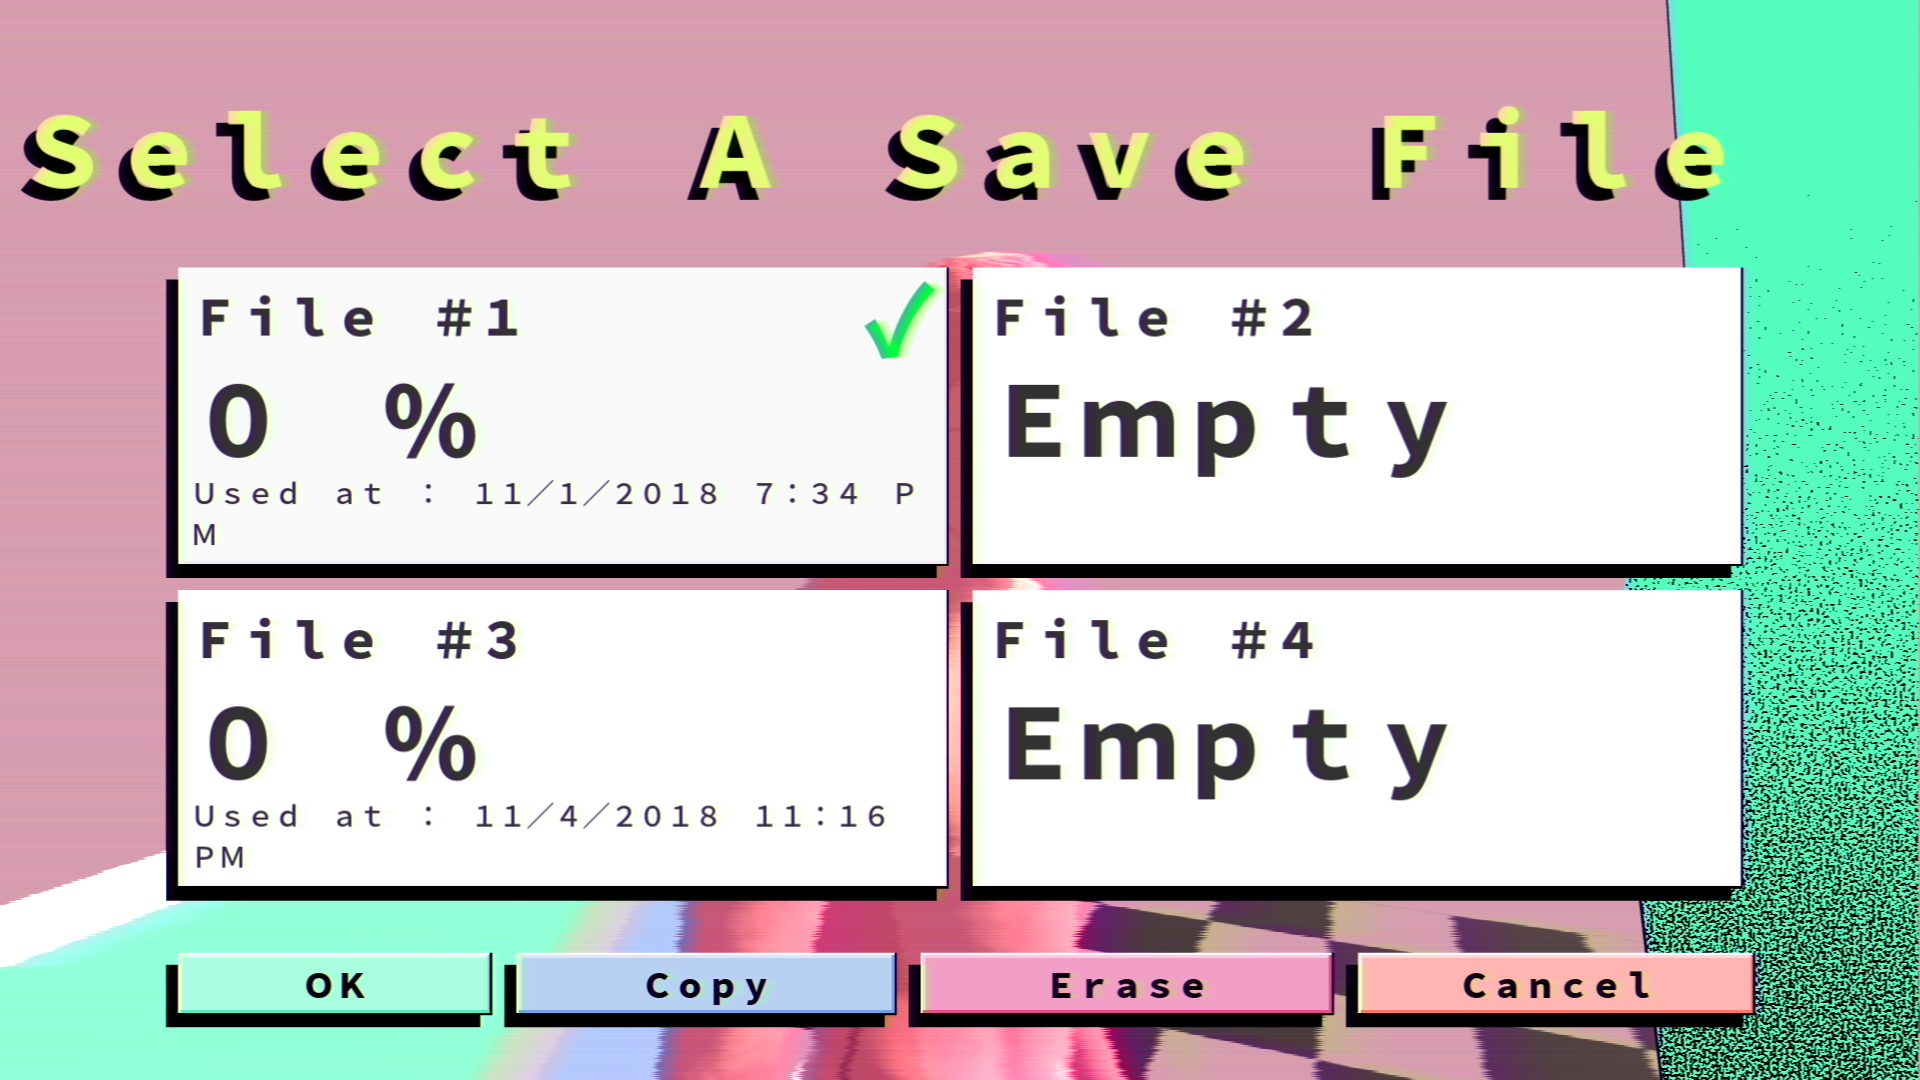
When the player enters the screen the last used savefile is highlighted. If the game is fresh then the first savefile is used.
Each save file also shows things like a progression mark and a last used date.
I have yet to precise how the progression percentage is calculated, though I have some ideas on how this can be done (maybe thought unlocks and achievements, but I'm not sure yet).
The player can also go back to the main menu using the "Cancel" button. Once the savefile is chosen, the screens translate to the character selection screen.
Character Selection Screen
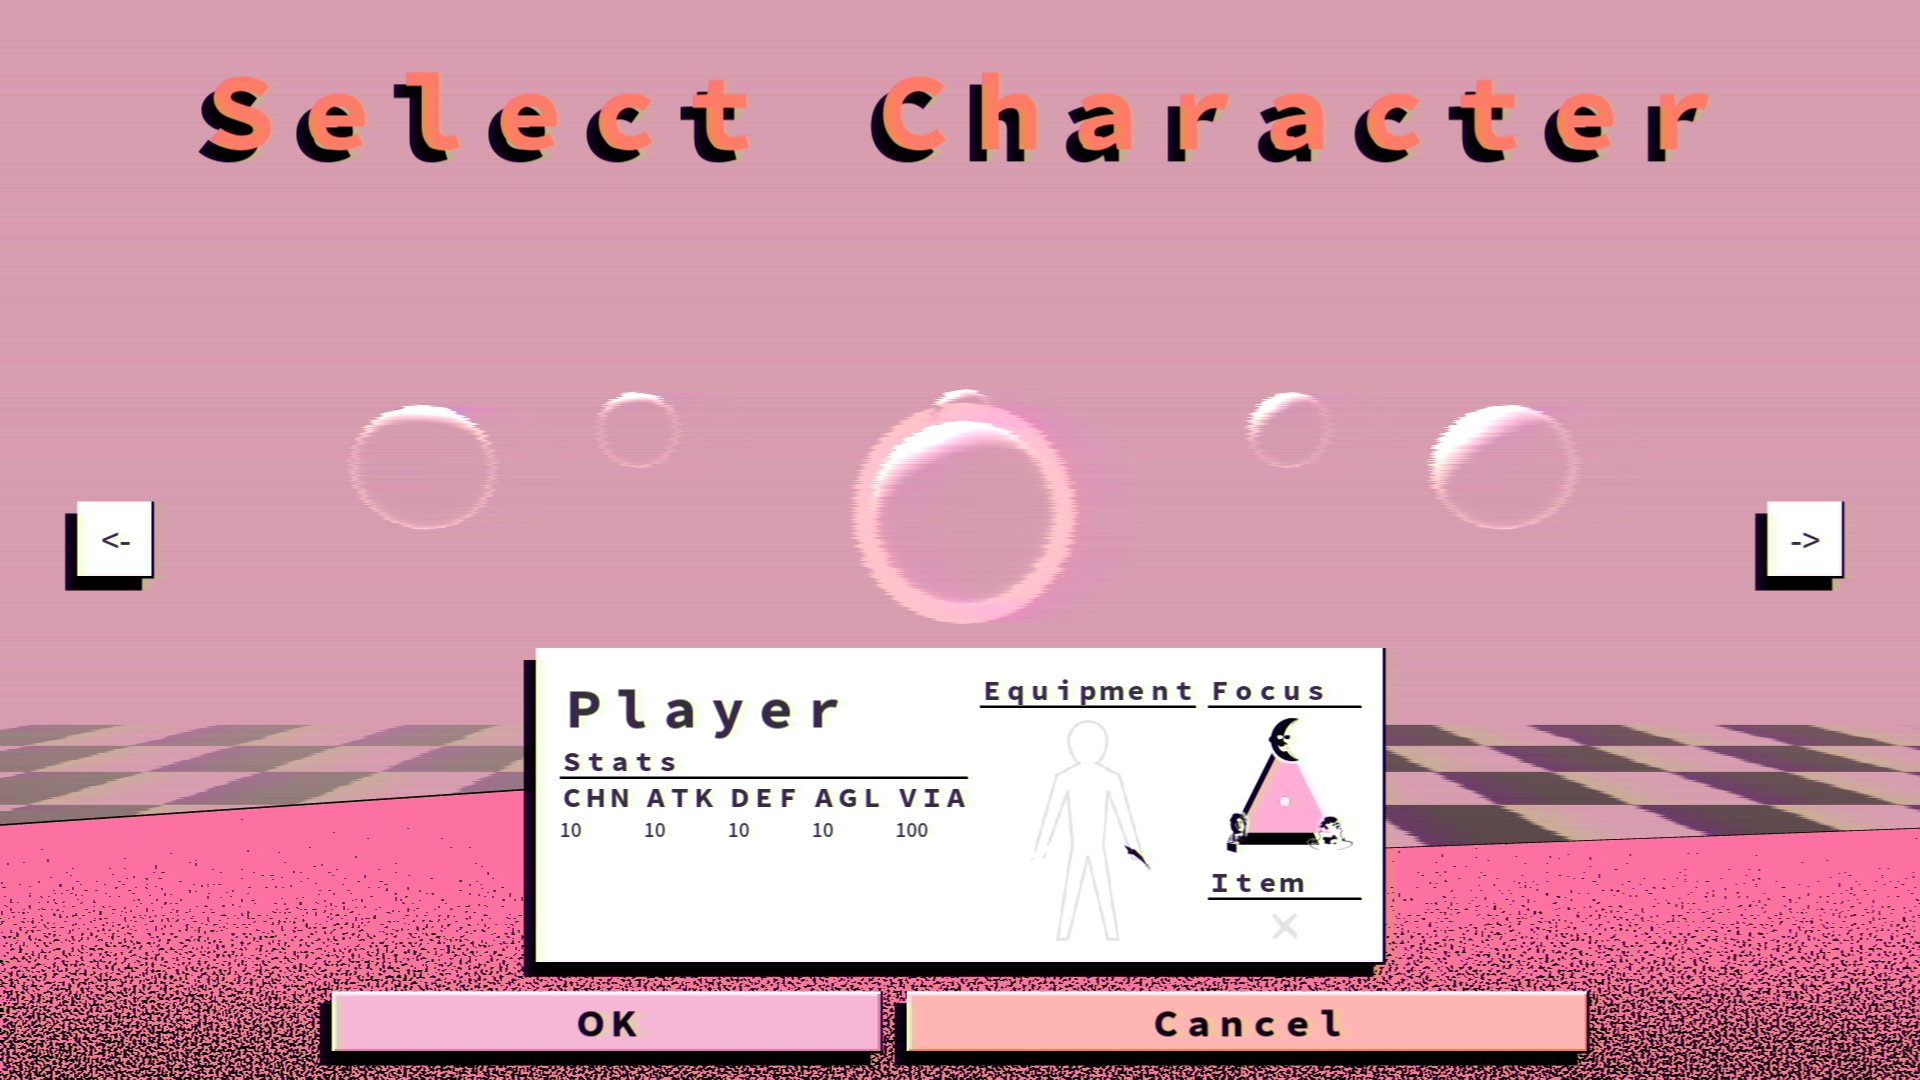
This screen is where the player chooses its characters.
Each character comes with different stats, focus and equipment. Each of these characteristics can be inspected through the white panel in the lower half of the screen.
Like how these components behave in the pause menu, some of these also have tooltips.
The characters themselves are laid in a circle formation. The layout system is dynamic enough to have n playable characters, and it's using the game object's children to do all of the layings.
The currently selected playable character has a thick outline and it often the one closest to the camera. Also, the currently selected character is determined by the selected savefiles' last used character. If the data is missing then it goes to the default character.
In order to change the currently selected character, the player simply uses both left and right arrows at both sides of the screen. This simply turns the contraption by a given angle (calculated from the amount of object present in the root game object). This changes the outline so that it'll follow the currently selected character.
Again, the player can either go back to the save file screen or proceed to the confirmation screen.
Confirmation Screen
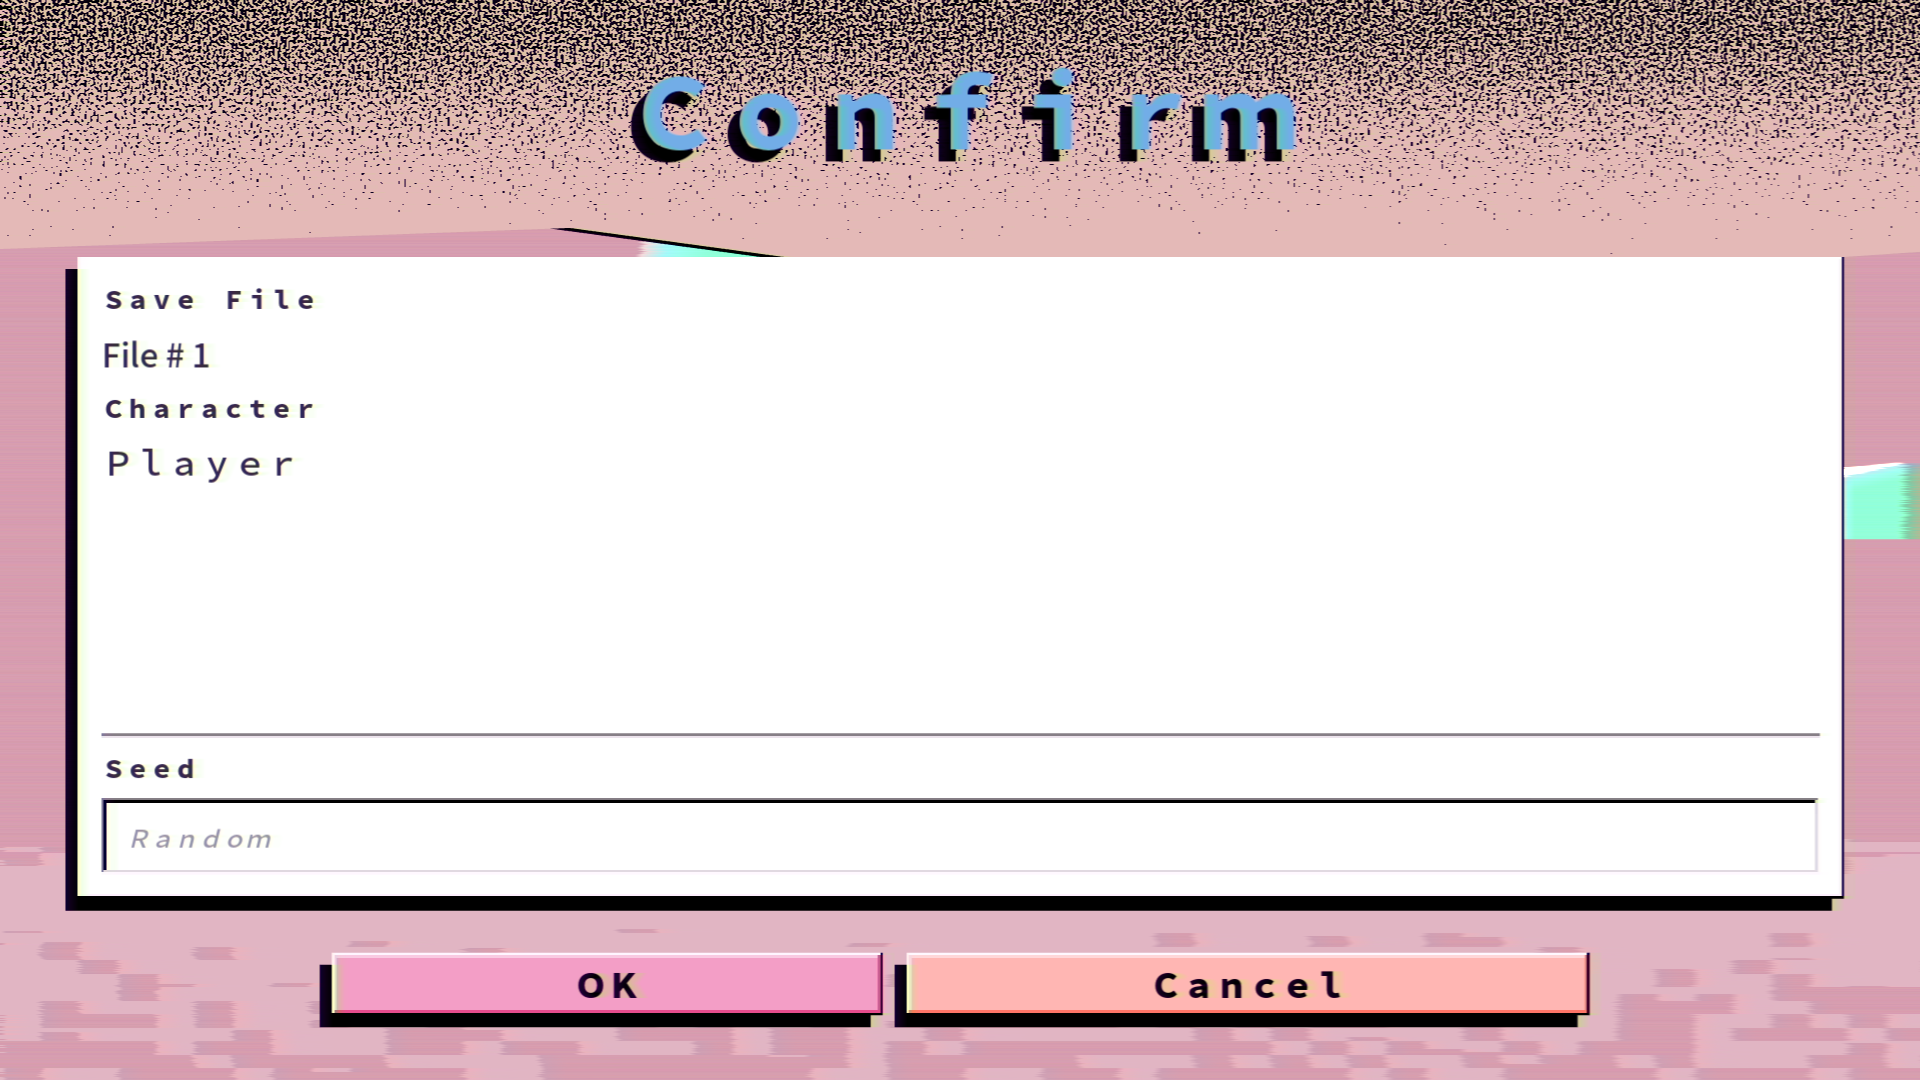
This is the last screen before starting the run.
In this screen, the player can review its run parameters (like the used save file and the selected character).
We can also set the generation seed at this point.
As of now if the player chooses to go back then he goes all the way back to the main menu...
I'm not sure if it's a better idea if we store from which screen the player came from and use this to send it back to the relevant screen.
Options Screen
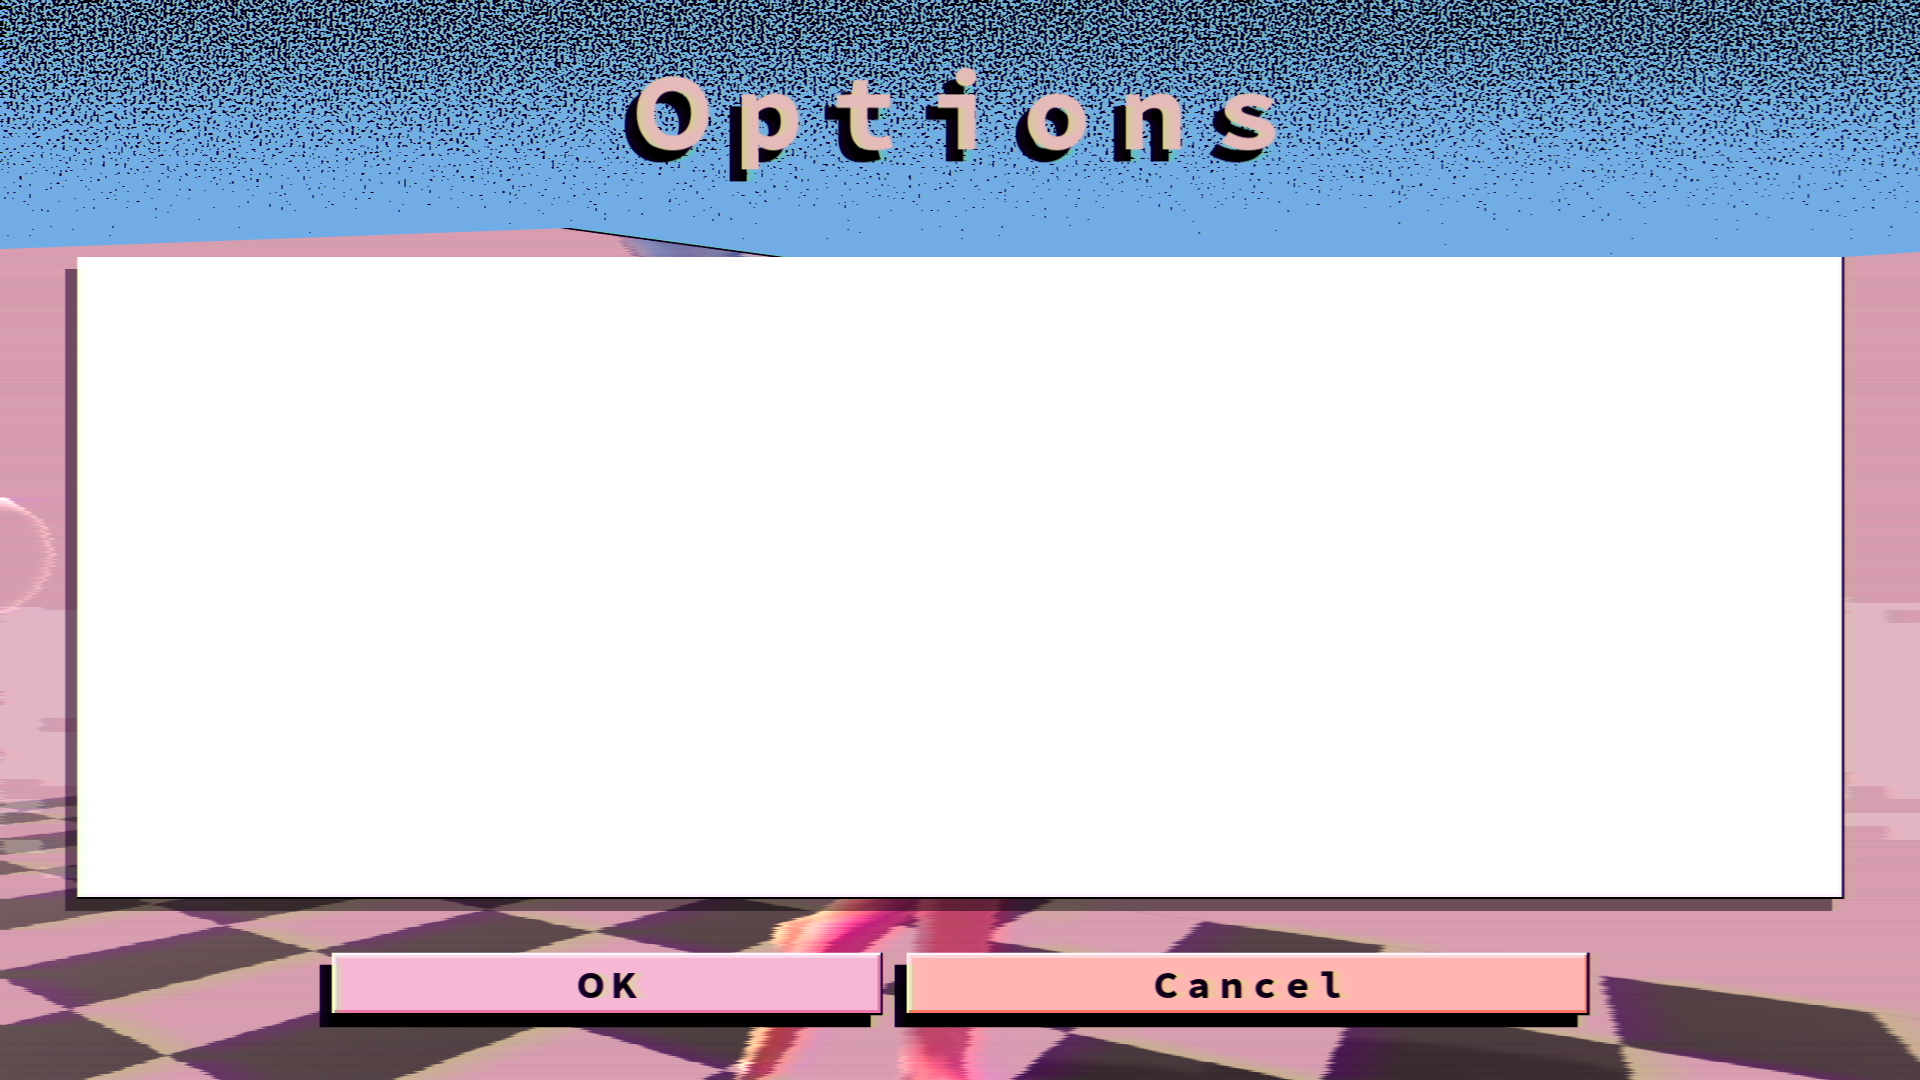
This is where the options will be displayed.
I didn't have the time to complete it yet, but it's still accessible.
There will be different types of settings typical of any modern games, like graphical settings and whatnot.
I've also planned to show statistic here. However, I'm not sure if I should have different tabs/view for each saves file... Technically I could place the save file selection right before the main menu and only show one statistics screen, but I'm not sure yet.
That's about it for screens.
Minor upgrades
-
Because of the new shader, I've also changed some of the pause menus to use the new shader:
-
There are also some GUI elements that also use these, like the aesthetics lines and health bars...
- I cant show them just yet because the menu kinda blocks the access to levels right now...
-
There are also some GUI elements that also use these, like the aesthetics lines and health bars...
- I've implemented a playable character class that stores any character specific things like equipment and such;
-
Also, save files are in. There's a simple serialization/deserialization going on with these:
- I'm not sure when to save though. Right now it's after each savefile changes (like when the player uses a crystal and whatnot).
-
I've also added a GUI shader that uses a special "Hard Light" blend mode when dealing with GUI element textures. Normally Unity uses chromatic multiplication to blend GUI textures with colours. This, however, makes any pure white pixels on the texture take the actual GUI colour;

(Hard Light on the left Left, Multiplication on the right) -
I've added a bunch of textures on buttons and panels.
- This really looks AESTHETIC now.
-
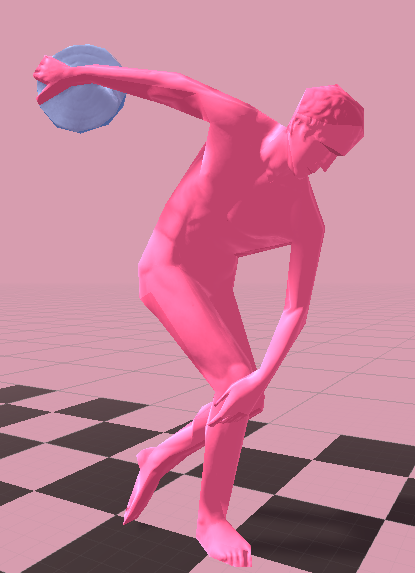
I've added a normal mapped variant of the AtlasShader.
- This is quite useful for the menus' statues.
-
Speaking of which these are actually still technically low poly (under 600 tris each!).
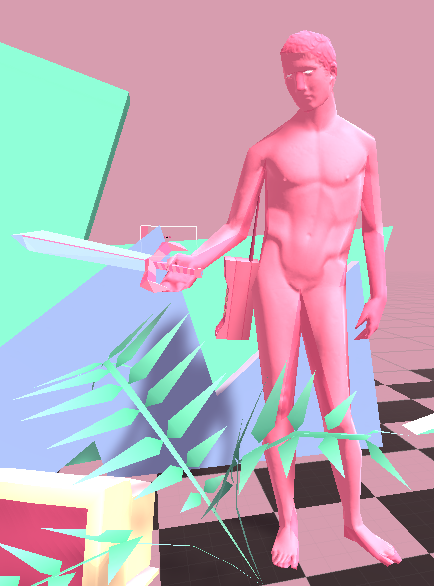
-
Their normal maps were baked from high poly models with over 2M verts!
- Needless to say that Blender crashed a bunch of times while manipulating these...
-
I've finally switched some GUI components to used the Unity's Graphic class rather than coding everything by hand and manually calling the CanvasRenderer.
- This makes the GUI element's code much cleaner and readable!
Next Week
If everything goes to plan the game will be in a playable state by beginning 2019 (or so I hope).
There's still some work to do with menus... For example, the options screen isn't fully there and so far no runs can be started. I didn't complete the actual level completion, and this might be a good thing to do afterwards...
Afterwards, I think I'll be able to code at least one dummy boss, with a somewhat simple attack pattern and whatnot.
After it's the usual suspects: Relics, Capacities, Activated items, Equipment... The list goes on.