Hi there!
Short entry, a bit tutorial-ish, about the tile graphics of the game.
Art direction, ideas
I really liked the style of the open art assets I used for prototyping. Pixel art, huge value differences between the wall and the floor tiles and a little noise to make it a little grimy & wrecked.

Though I liked it's looks and simplicity, I wanted to try some other ideas before settling on anything so I went ahead and made mockups.
False positive
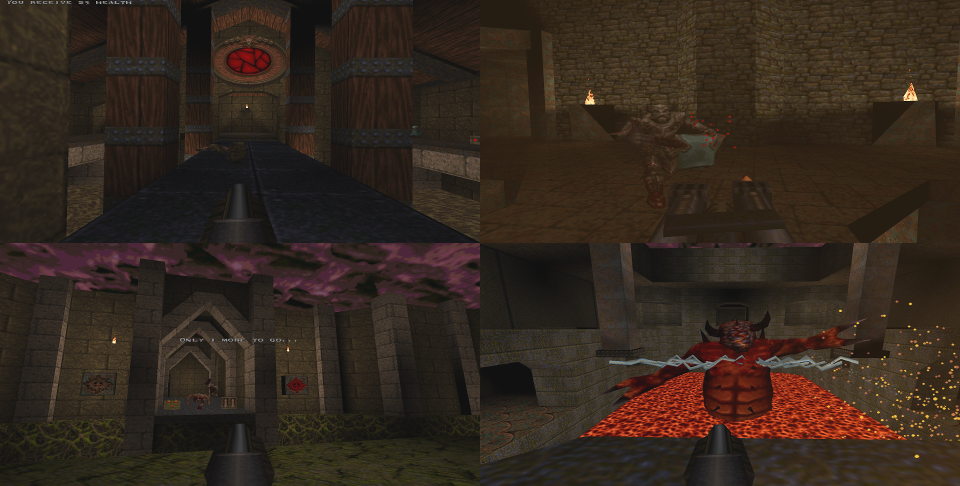
The most interesting and furthest developed one was a tile-set and look with an oblique top-down view effect. I think this looks really good in many games, but sometimes it can get too exaggerated covering too much of the entity sprites.
I came up with this, but I decided to scrap the idea. I liked it sort-of, but making multiple varied sets for the 30 to 60 minute long campaign and fully fleshing them out in this style would require and immense amount of work. I choose the original simple style with a decent amount of variation instead.
Goals, final looks
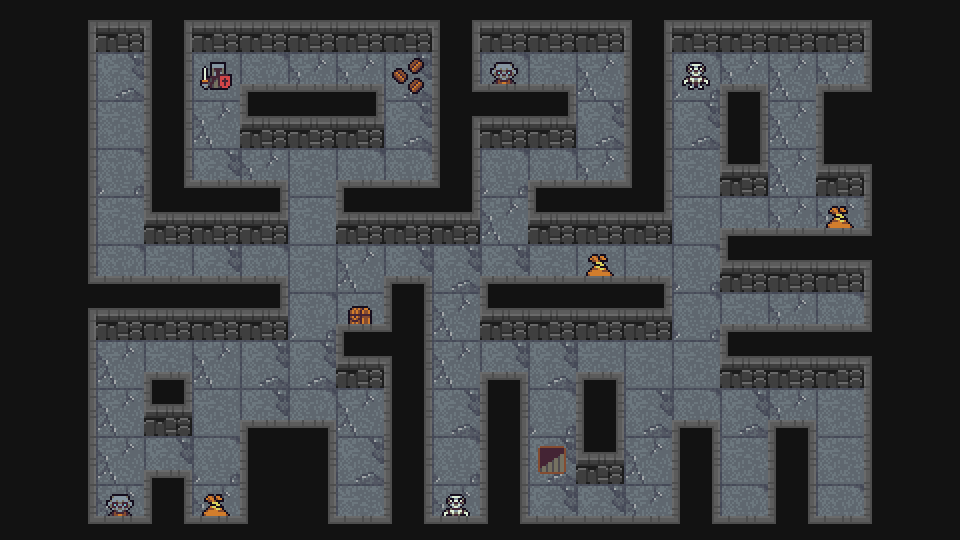
So I returned to the looks of the prototype. Easily distinguishable wall and floor tiles, noisy and grimy places (it is an old dungeon after all) and good variations (many sets and small randomization within each set too) so it does not become boring during a full play-through. I needed a cool palette. Something murky. While picking colors I naturally deviated towards the looks of a game I always cherished for its atmosphere :) .
Colors were picked carefully for supporting the look of the entity sprites, as they will use a marginally different palette full of contrasting colors instead of saturated ones to make them pop from the terrain (again just like in the prototype).
Here goes some shots about the results:
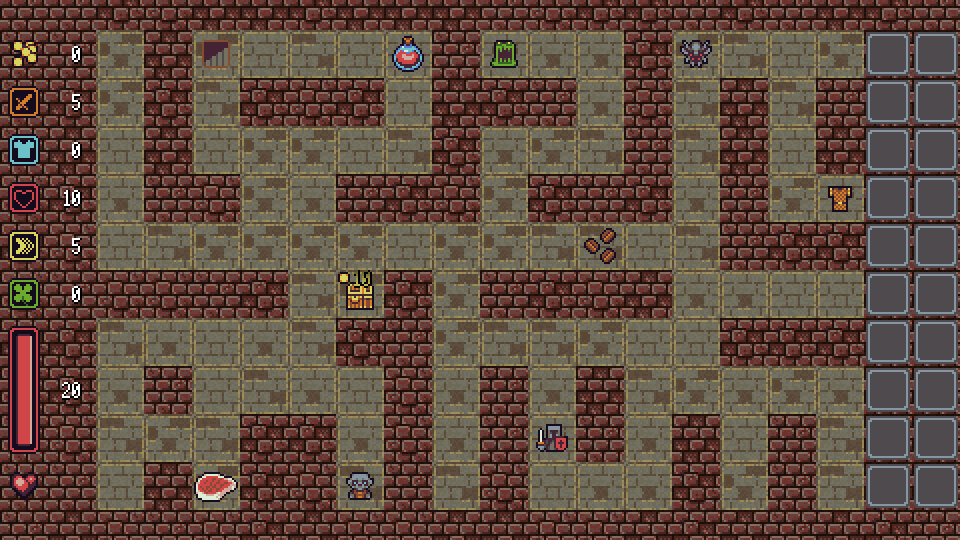
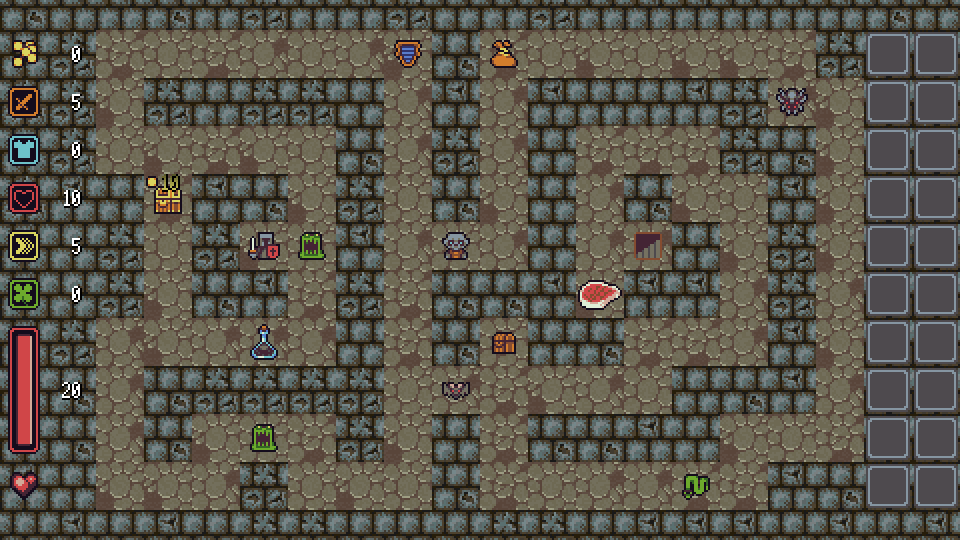
I have 10 different tile sets ready which I suspect will provide a good variety :) . With 30-ish level deep dungeons a set change will happen after every 3 levels.
How-to?
For creating a lot of pixel art tiles, like the ones I made, you are going to need a frame so to say. Some rules and patterns how you start pixeling each tile and afterwards patience for experimentation. That is all to it actually. I walk through the creation of one.
I use GIMP, a free and cross-platform image editor, but pixel art can be done just as well in a lot of paint programs (even in paint, but I advise you to choose a better one which supports layers). A graphics tool which can work with tiles or a hot-reload engine feature (because GIMP as an example does not support tile graphics) also helps, since you can check while you are drawing, whether your graphics work well when tiled instantly.

First I usually start with selecting values for the whole set. This is a handy technique for defining an overall lightness/darkness balance for each tile.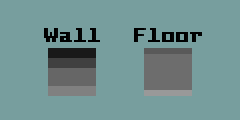
Than I "sketch" a simple pattern for a tile using the values, usually with a light-source residing in a North-West direction.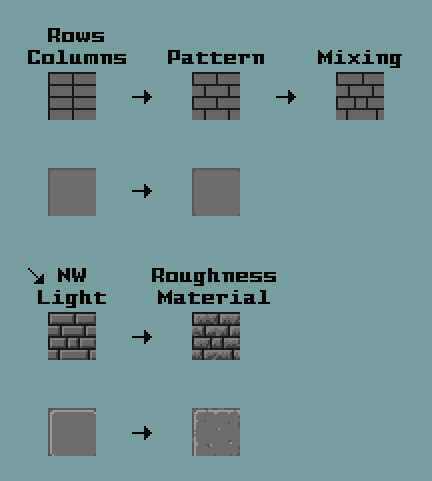
I add a little variation, like cracks, missing bricks, mixing up the pattern etc... Detail like wines or stains can be added after coloring is done but this step alone makes enough differences between tiles.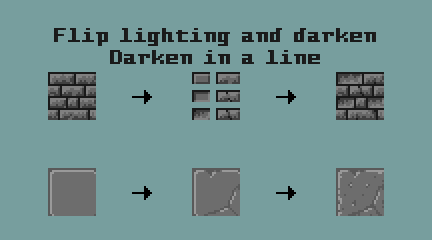
I know simply selecting the same hue for the given values feels easy, but it makes the outcome look kind-of boring. Try to make colors interesting by selecting at least two different hues and by playing with saturation a little. It will make a huge difference!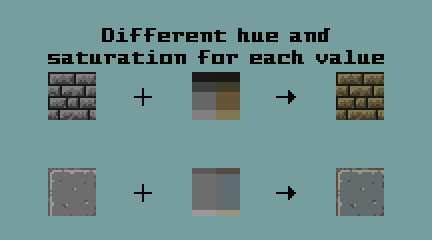
Now you have a nice looking tile. The next step is optional. Adding noise was a deliberate style choice in my case. You simply add an extra set of values with only slight changes relative to the originally used ones. Select the noise colors the same way as the "normal" colors. Generate a noise pattern and overlay the noise colors on top of the tile using it as a mask.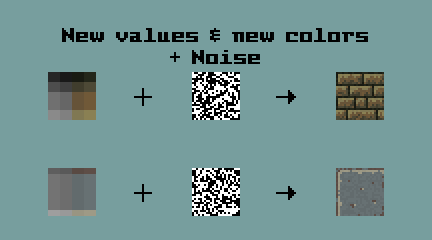
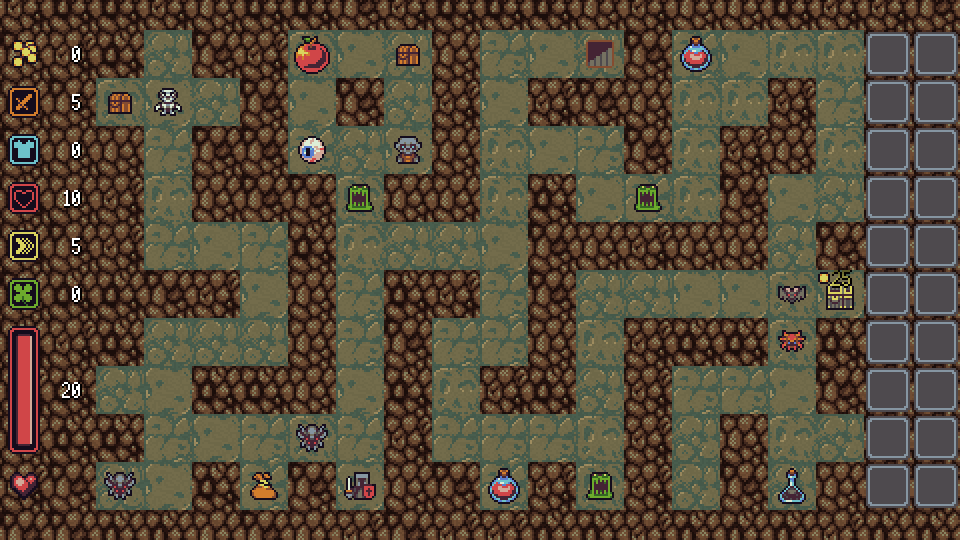
A screenshot with the final tiles: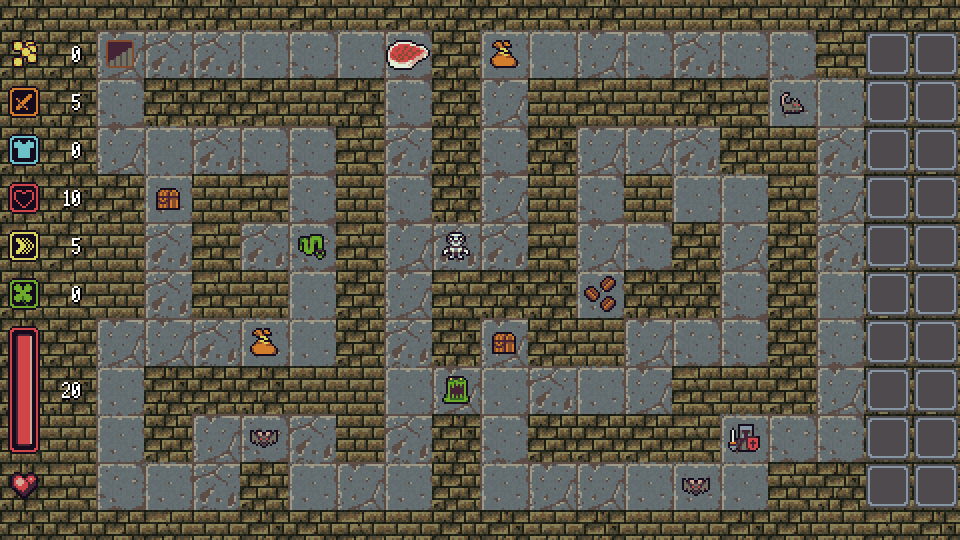
Thanks for reading.
Stay tuned!